- Adding Templates to a Session:
After uploading your templates, you are ready to create a Session. A Session will compile all the field tags in your templates and present them to the Session-user. After the Session-user completes all the required fields, the final document can be exported.
2. Select the Sessions View:

3. Click Design New Session:

4. Name your Session Click Save:

5. In the Available Templates column, all templates uploaded to your instance will appear. Select the template(s) that will be included in the Session by dragging them to the Included Templates column.
NOTE: You do not need to drag the conditional child templates to the Included Templates column. Only move the parent template to the Included Templates column.

6. Select Guide Pages: Note: Session Name and description can be changed at anytime

7. Click New Page and enter a Title and Description (optional). Click Save: Repeat for any additional pages you will have in your Session.
Note: Select For External Use if the page will be open to users outside your organization. If not checked, the page will be accessible to internal users only.

8.Drag and drop the field tags from the Unassigned Fields column into the appropriate pages.
- We recommend using logical groupings of field tags instead of using the order of how they appear in your templates. For example, Page 1 could be Basic Information which would contain names, addresses, contact information, etc. Page 2 might be Terms and Definitions and so on for the remaining pages.
- Repeat until all field tags have been placed into a page. You will not be able to publish your interview until all field tags have been distributed.
5. You can also use the Preview, Edit, Remove Page, Expand All and Collapse All functions to modify your interview.

Preview: Preview the current layout in your Guide page. You can also edit fields from this window.

Edit Page: This will allow you to change the page title, description, and if available to public invited or internal users only.

Edit: This will allow to edit Assigned Field.
Delete: Fields in the page you delete will return to the Unassigned Fields column on the left.

Expand All: Shows Assigned Fields in Pages
Collapse All: Hides Assigned Fields in Pages

6. Once all fields have been assigned to pages, select Template List. Check all documents that should be available in List. Learn more about List

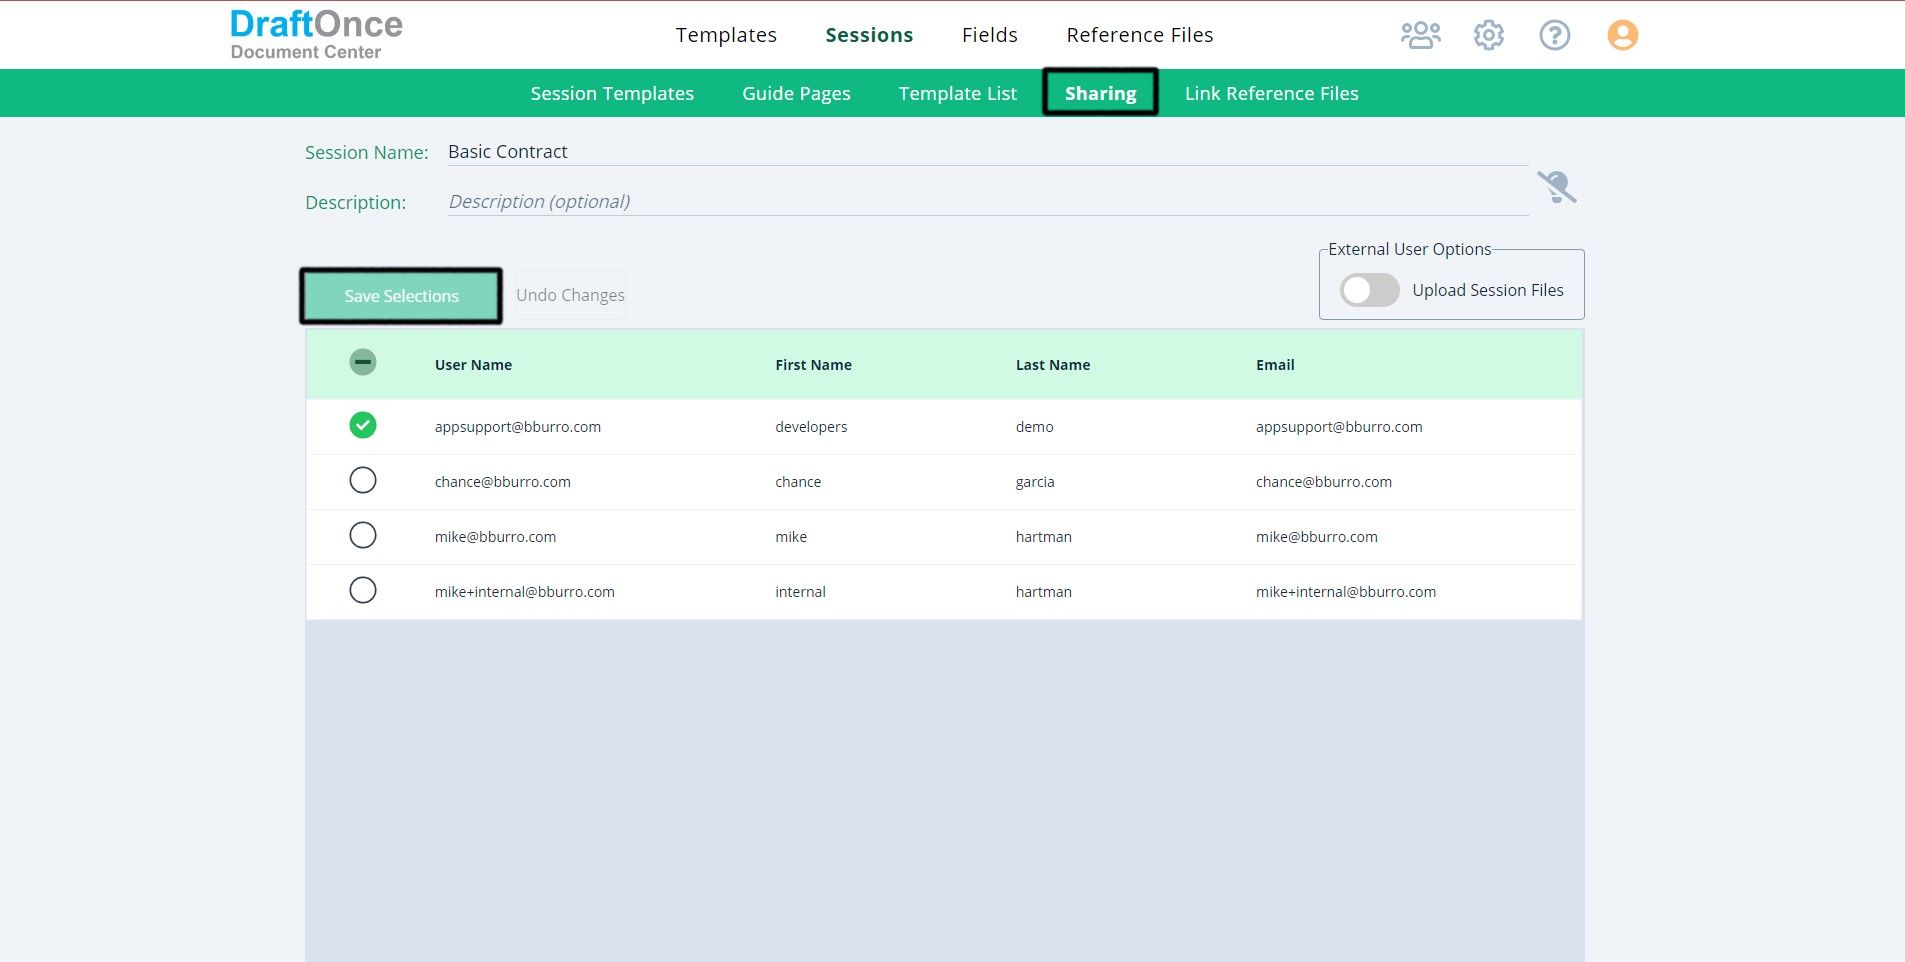
7. Select Sharing: Check the appropriate users that the Session should be shared with and Click Save Selections. Note: select External User Option toggle to allow public users to upload sessions.

8. Select Link Reference Files: Link Reference Files are available in all Sessions. Select from past Reference files or Upload New reference file to link to this session.
Note: Linked files will appear in box below Session Name Description

9: When Completed Select the Light bulb icon to Publish

